


LEARN
Some Thoughts on Wingsuit Openings
This article is also available in French!
Flying a wingsuit, if you’re ready for it, is pretty straightforward. It doesn’t take much effort: Just relax, look where you want to go, and fly it back to the DZ without hitting anything. The tricky part – the part that even some highly experienced skydivers still struggle with – is the deployment and opening of your parachute.
This article is an attempt to collate some of what we know and have learned from testing both wingsuits and parachutes in recent years. This is what we think works best now, in 2016, and it may contradict some older stuff written by pudgy ponytail clowns. The techniques described here will, hopefully, eventually, be replaced by better techniques in the future. Such is the nature of progress and communication. Out with the old, in with the new!
The “pull” is the beginning of a process, not the end of one.
The most common mistake is to stop flying or controlling one’s wingsuit and body once the BOC reach begins. Reaching for the pilot chute and deploying it is the beginning of a process that needs your full and active participation.
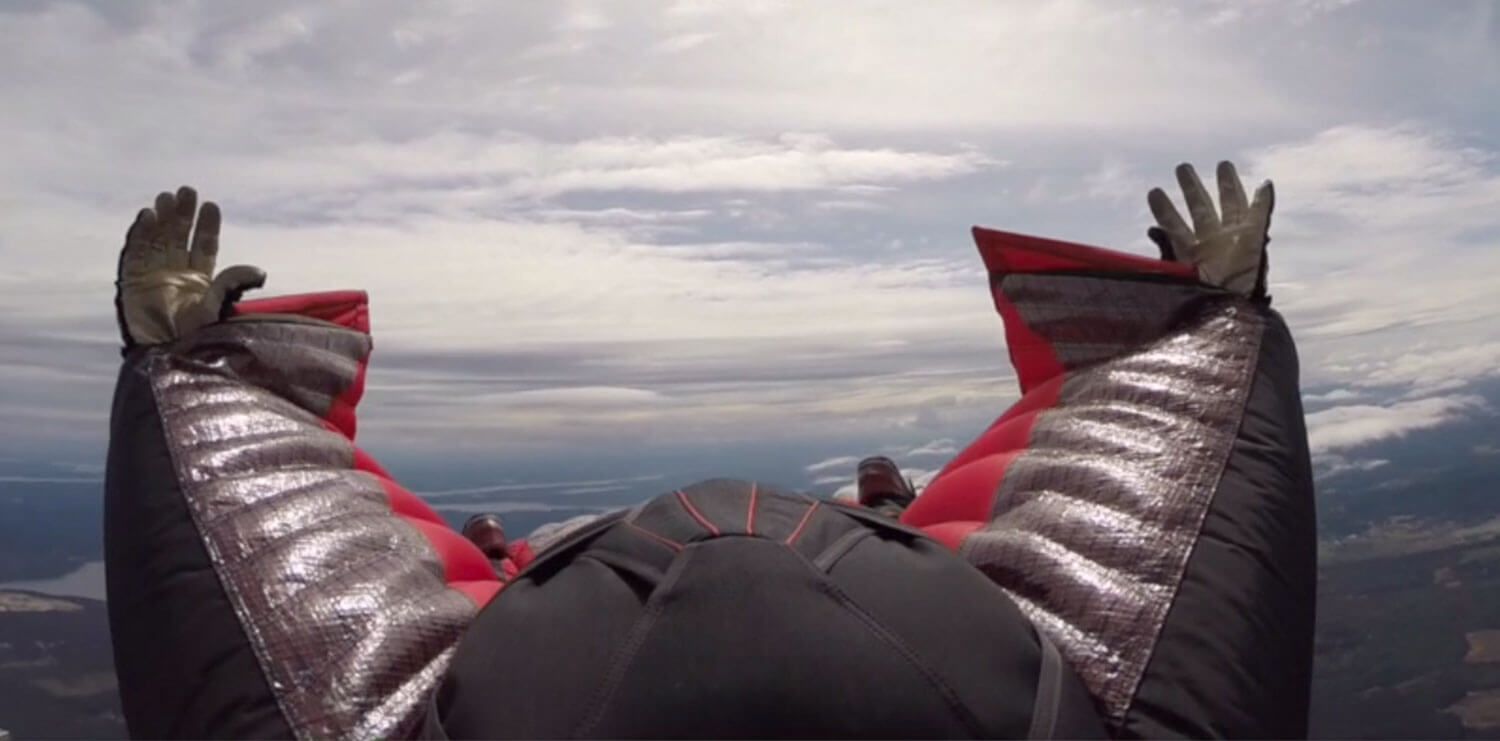
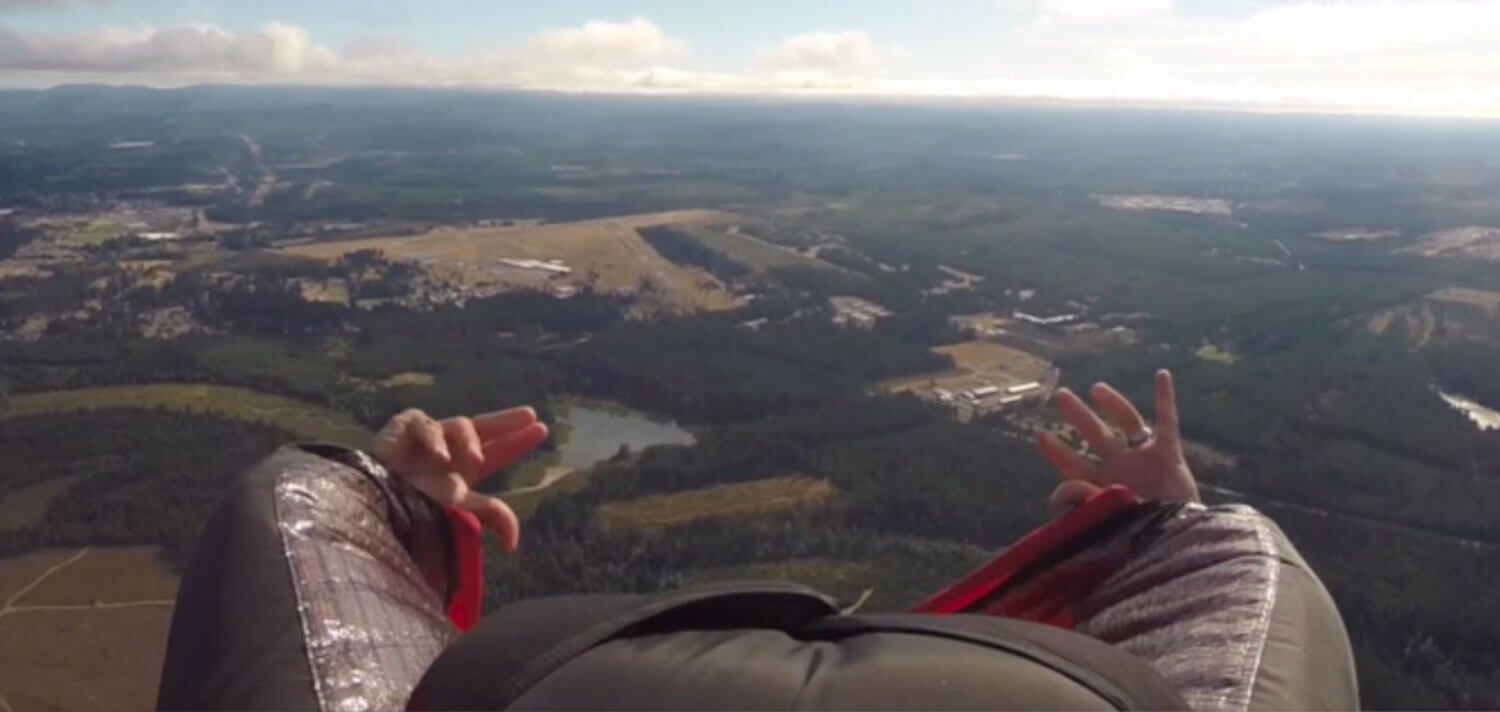
First and foremost, fly your body and your suit symmetrically through the entire deployment process. Whether you collapse everything or collapse nothing, you need to do it symmetrically, and in order to accomplish this, you have to maintain an awareness of your actions. Pitching out your PC and then going limp or just thinking “it’s over now” will not work. We see people “give up” on maintaining their heading, pitch control, and suit symmetry the moment they begin to reach back to their BOC. This could be the one moment of the flight where symmetry is most important.
Concentrate on keeping your shoulders level and perpendicular to your line of flight. Choose a marker on the horizon and maintain your heading directly towards it. Once your risers begin to load, keep the load equal by reacting to the feedback transmitted from your opening parachute.
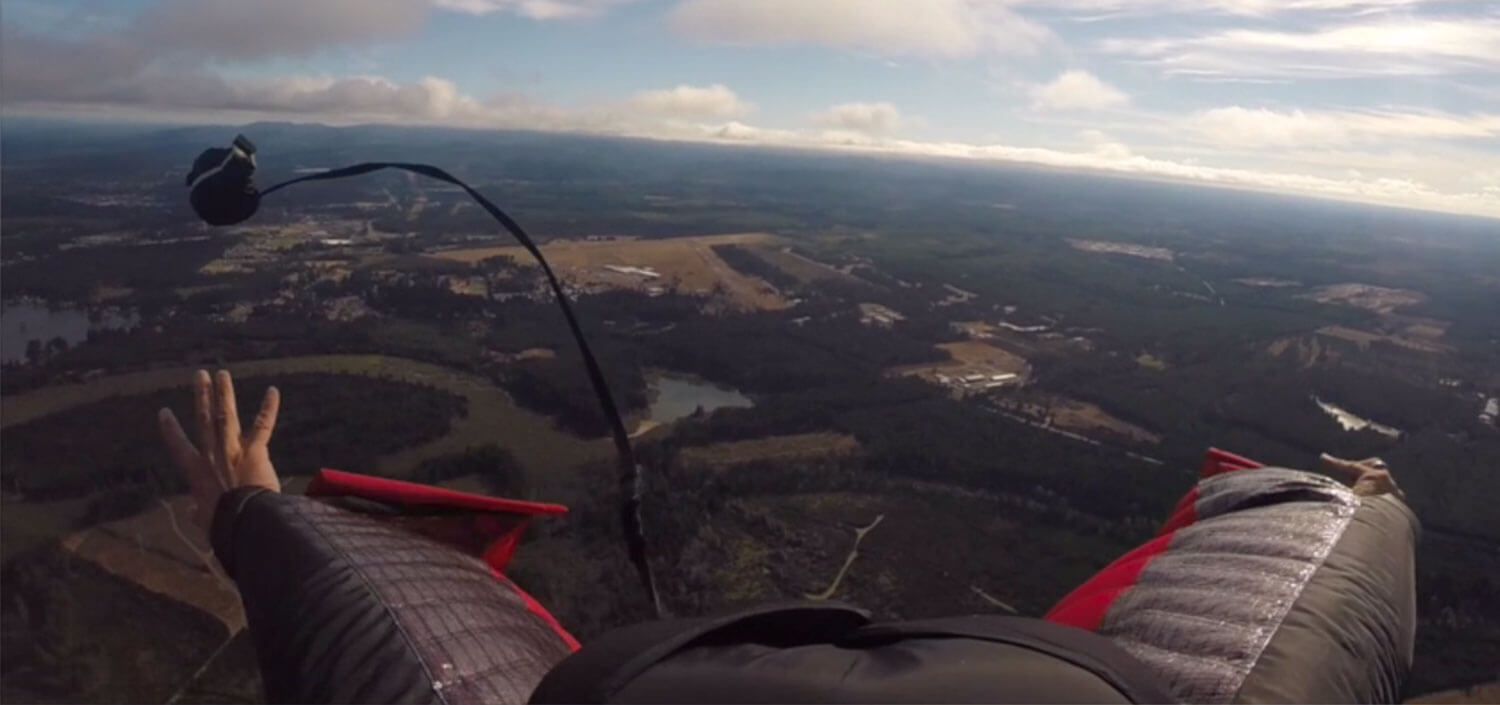
Throw your PC like you mean it.
We know from countless rear facing WS BASE camera angles that a weak toss and slow flight can render a pilot chute completely useless if it is sucked onto your back or leg wing. To prevent this, reach back symmetrically (most pilots reach back with both hands, to keep arm wings symmetrical), and deploy symmetrically, with enthusiasm and gusto. A wildly aggressive pull will negatively affect your body position, so keep it under control.
Deploy your PC with the clear and unwavering intent to get it into the clean air that is well to the side of your wingsuit. Never drop it, and never half-pull or half-ass this process.
Think symmetry, not just for your body, but also for the airflow behind you.
At 100mph, even your hand creates a significant and long-lasting wake. The surface of one of your arm wings is considerably more influential. By making your two arm wings even slightly asymmetric, you can create an impressive amount of swirl in the turbulence behind you, which is guaranteed to affect your pilot chute and canopy as they begin to inflate. Symmetry is not just important for the loading of your harness, it’s also critical to the airflow that feeds the inflation of your PC and parachute.
Obviously, while your asymmetric position is disturbing the airflow, it is also changing your heading. A heading change during deployment will not help your opening.
Avoid habits that will ruin you in Wingsuit BASE, if you’re planning to go there someday.
If you never plan to BASE jump, and you never intend to jump a higher performance wingsuit, no matter what, then you can crumple yourself up into a cannonball and lose 1000’ of altitude before every deployment if that’s what you like (as long as it’s a symmetrical cannonball). But, if you think you maybe one day want to be a wingsuit BASE jumper, or you might want to jump a more advanced wingsuit design, then let’s start smart and develop the proper muscle memory now.
This means deploying from a flying position. If not full flight, then at least close to it.
Your first wingsuit BASE jumps will be made on a moderate to small-surface wingsuit, which will not be capable of a powerful or efficient flare. When BASE jumping smaller intermediate wingsuits, it is very important to maintain speed and glide while deploying. Do not slow down to minimum-sink before pitching. Keep clean air flowing over the top surface of your suit, and maintain forward flight during deployment. Fly efficiently, fly forward, and collapse nothing.
One day, when you are jumping a more advanced wingsuit, you’ll be able to flare up and gain 100+ feet, do a barrel roll, smile at your belly camera, and then deploy however you want. But save the silliness for later.
Do you ever plan to jump a larger more advanced wingsuit?
If you’re going to grow your wings someday, then developing a dependence on wing collapse for deployment is not the best plan. Five years ago, most wingsuits could be collapsed for deployment with only moderate effort, even the largest designs. Things have changed, and today that is not the case. Modern higher performance suits have higher internal pressure, higher trim speeds, and more leading edge structure. All of these things recommend a full-flight or near full-flight deployment.
A full-flight deployment can be applied to any suit. Learning it early – although maybe not in your very first month of training – is a good idea for pilots who intend to progress further in the sport.
That being said, the beauty of modern wingsuit designs is the wide speed ranges that are possible. Varying airspeed and pitch changes internal pressure and makes it easier or harder to collapse and pitch. Because of the wide range of speed options, we have a wide range of deployment technique options. In a larger design, if you want to flare, reduce airspeed, and crumple it up, you can! But today, most advanced pilots do not collapse their arm and leg wings. There are lots of options, but the factors that form the basis of a full flight deployment are:
Airspeed control: Don’t deploy in a stall, or at a steep angle.
Reach technique: Reach around the top surface of your arm wings, “squeezing” as little air as possible out of them. The path to your BOC is not through the wing. The path to your BOC is around the top surface of the wing. Practice this on the ground with a blower inflating your suit, and do hundreds of practice touches during skydives. The muscle memory needed to rotate your wrist properly and reach around the top surface of your arm wing, with your hand going directly to your PC, requires training.
Any pull technique that involves squeezing or collapsing your arm wings or touching anything other than your PC handle before finding your PC handle, should be improved.
The entire process from thought-initiation to PC release should take about one second. Train this movement until you know for certain that you can go from normal flight to PC release in one second. Your hand should pass over the top surface of your wingsuit and go directly to your PC, and your PC should be released into the clean airstream well to your side, before one second is up.
Remember that there is a zero-percent chance that your skydive BOC and BASE Container BOC are located in the same place. What this means is that if you apply the same motion to your BASE container that you have been practicing on your skydive container and miss your PC, you could die. It has happened before. Practice touches are important on BASE jumps, too. In addition to that, being sure that your equipment fits properly and is properly configured is critical. Finally, leaving yourself altitude margin to be imperfect, as we all are, is critical.
These are basic guidelines which you can use to develop your own technique. Don’t listen to anyone who tells you there is only one way to do it, because there isn’t. Keep your mind, and options, open.
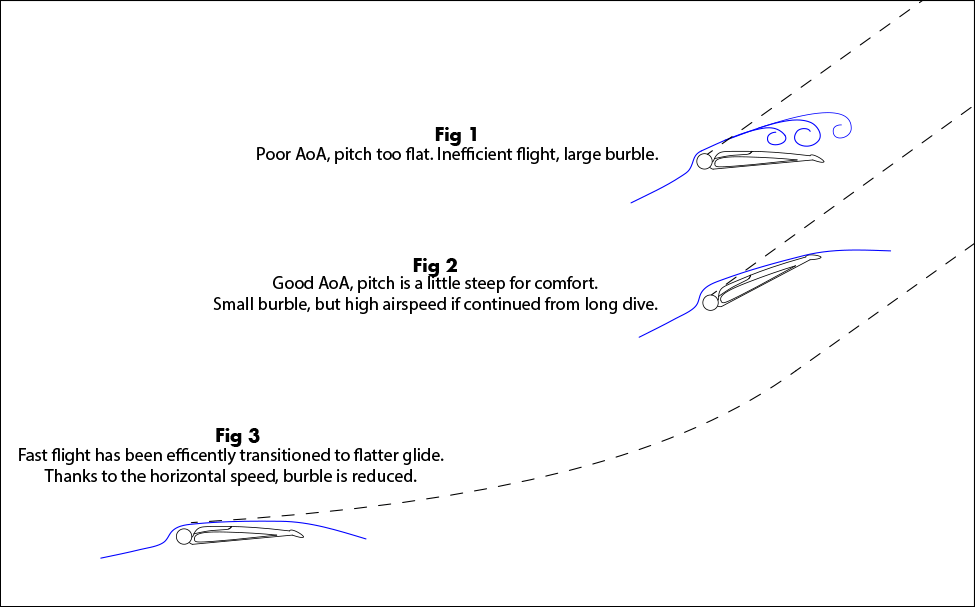
Airspeed: Not too fast, not too slow. Keep it efficient, keep it clean
The beauty of wingsuit parachute deployments is that you have a lot of control over your airspeed. If you want to have a more aggressive parachute opening, then you can fly steeper and faster. If you want to tow your PC for a while, then you can slow way down. Happiness is a speed somewhere in the middle, and we must also deploy into the cleanest possible air; to do that, we need to manage our burble.
Burble management is secondary to airspeed management. First, adjust your airspeed. You will learn very quickly what makes you go fast or slow in your wingsuit, and what airspeed works best for deployment. Next, you need to arrive at that airspeed with the correct Angle of Attack. The correct AoA provides a clean airflow over the top surface of your suit.
The process is: Fast or normal full flight, then slow-down (brief flare), then level-off until you feel air flowing cleanly over the top surface of your suit, then deploy symmetrically.
Equipment: Bridle length, PC size, D-bags, packing
Bridle length: Longer is not better. Around eight feet from pin to PC is adequate.
PC size: For skydiving, a ZP PC in the 28-30” range is the commonly accepted norm. For BASE jumping, consider packing it like this.
D-bags: Many jumpers feel that stowless d-bags yield smoother openings. I myself am a huge fan of them for wingsuit applications.
Packing:
A typical skydive deployment sees your PC, bridle, D-bag, and parachute lines all extended above you in a vertical chain. The chain of deployment occurs mostly vertically.
When you are flying a wingsuit, the deployment chain is spread out more horizontally.
This more horizontal deployment chain is sensitive to many factors; your burble, the efficacy of your PC, how you stow your lines, your d-bag design, and how you pack your parachute.
The more time that your parachute system is elongated in this horizontal configuration, the more opportunity it has to get weird. Once your parachute begins to emerge from the d-bag, your PC is being killed. At that moment, your uninflated parachute is like a like a tumor on a jump-rope, and your burble is causing it to dance around like an epileptic lizard.
Often, at that stage where your parachute lines are extended, your PC is killed, but your parachute has not yet begun to inflate, line twists occur. The more time you allow your parachute to dance and twist in this position, the more line twists you will have.

The solution is very simple: minimize the amount of time that your parachute spends uninflated, dancing around at line stretch. To do this, one option is to not roll the “tail” (trailing edge) of your parachute so tightly around your lines. The technique of rolling the tail tightly around the lines was not developed, and should probably not be used, for wingsuit flying.
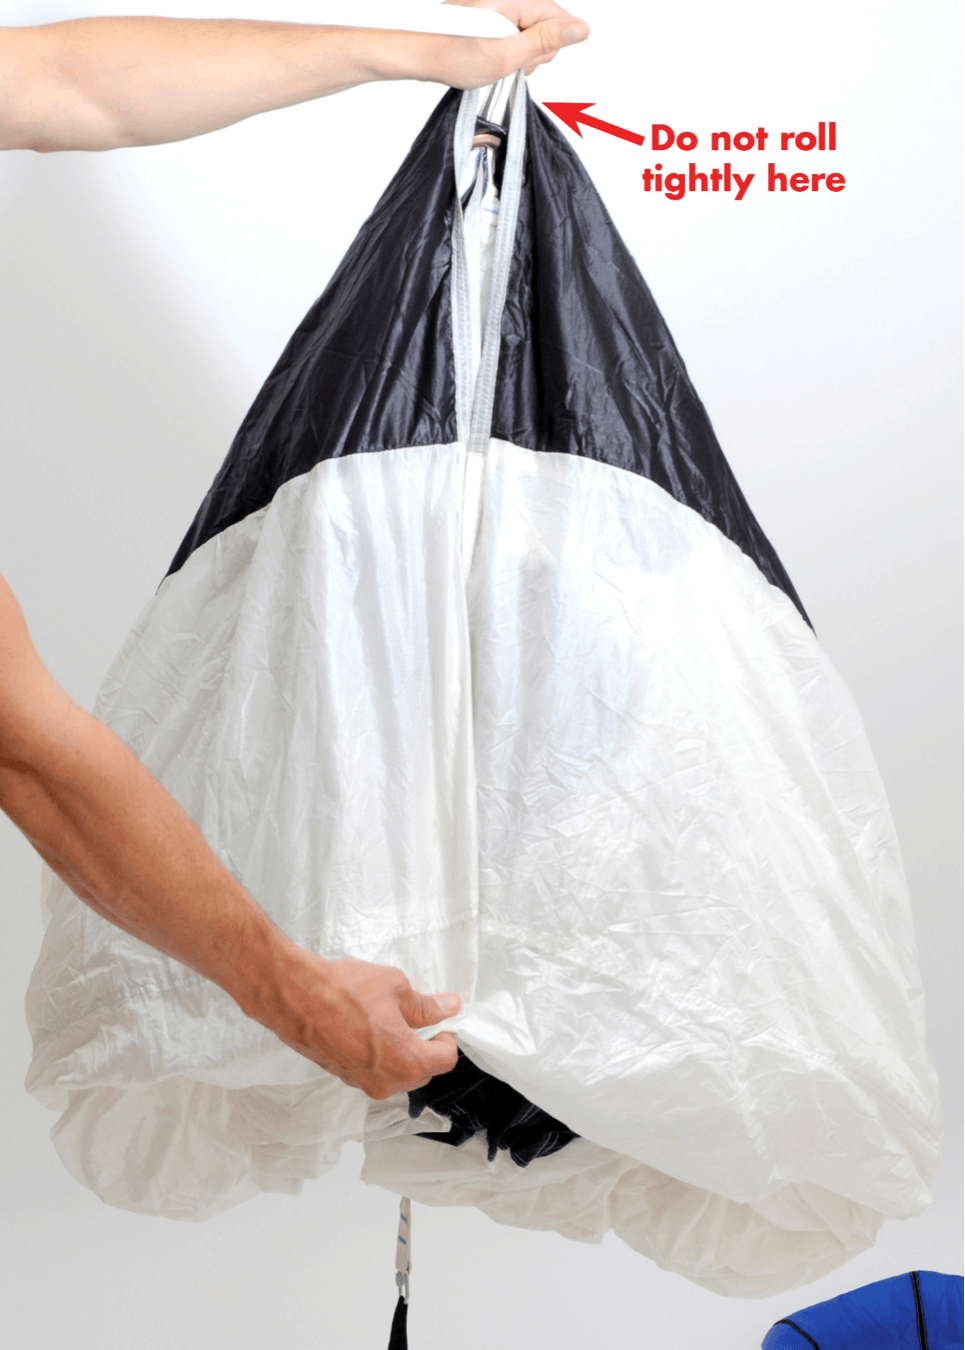
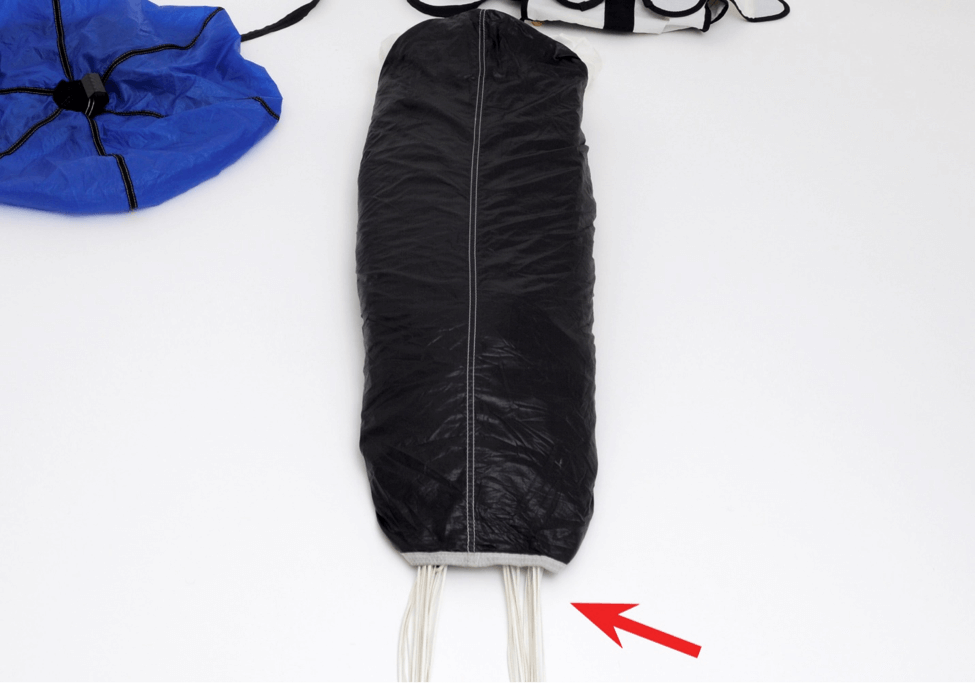
By leaving an open channel here, and rolling the folds together lightly, just 2-3 times, it will encourage earlier parachute expansion once your packjob reaches line stretch. The sooner it expands, the less time it has to twist and twirl, and the fewer line twists you will have.
What’s that you say? If you pack like this, you’ll get “slammed”? When you are jumping a wingsuit, you control your airspeed destiny. Pack for the type of jump that you are doing.
What’s that you say? If you collapse all of your wings and drop like a stone it eliminates the horizontal nature of the deployment? The problem with this is that most intermediate-advanced wingsuit designs cannot be easily or effectively collapsed before deployment – at least not without a huge flare and associated reduction of airspeed and therefore internal pressure.
If the thought of packing this way scares you, or you think it’s a bad idea, then don’t do it. All we can do is offer what has proven to work for us when flying high performance wingsuits.
Twists: Why they happen, how to avoid them, how to get out of them.
The first type of “twists” occur at your packjob, behind you, out of sight. You will only know you have them once your parachute begins to inflate and you feel your risers a bit too close together, angling in towards the twists (you can feel this if you jump a wingsuit that allows early riser access without cutting away or unzipping arms). These twists are the result of packing and asymmetries discussed above. To prevent them, work on your packing and symmetry.
The second type of twists occur at your body, and are caused by you rotating underneath an inflating or flying parachute. These are extra stressful because sometimes they can be hard to stop, and often result in the highest number of rotations.
The best way to end up with a whole bunch of body twists is to deploy in a slight turn, load your inside riser by dipping that shoulder, and then have hard or violent opening. As your parachute inflates, you are inputting a turn with your shoulder. There is no harness design that can prevent this shoulder-input, regardless of what gimmicks you might have seen. As that turn continues during the opening, your body may begin to rotate on the axis point of the inside riser. Once the rotation momentum begins, it can be difficult to stop. An abrupt or violent opening can aggravate this, and the worst body twists in WS BASE invariably occur during the hardest openings.
Body twists can be prevented or discouraged with riser control. The moment that your parachute loads and begins to sit you upright, your hands should be on your risers. You should be steering your parachute via the risers, maintaining your forward-facing body position via the risers, and holding the risers apart, if necessary. All of this will help to keep you facing forward, on heading.
To reach your risers: As soon as you deploy your PC, immediately punch your fists straight forward, then reach up and grab your risers. Holding your risers apart will help to stop any body rotation, and you will be able to control your canopy.
Note that it is possible to overdo this. If you reach up and crank your risers apart early and hard, and there are packjob-induced line twists occurring, then you may cause the twists to happen higher in your lines, exacerbating the situation. Moderation and sensitivity are key.
Needless to say, jumping a wingsuit that allows you to manipulate at least the bottom section of your risers without unzipping or cutting away is very important.
Once you’re in twists, and it happens to us all, the best way to get out is to rotate the twists down to your risers, so all twists are below the links, and then push off one riser to untwist yourself. This is by far the most effective method that we know of, yet. Watch this video for demonstrations:
Two more options, just in case:
- Stick one arm wing out into the airflow, and use it to “windmill” your way around. You have to do it on the correct side, and you have to have an arm wing big enough to catch air and influence the turn.
- Kick and scream. Some say this works.
Another cure for body twists is maintaining a symmetric body position. If you deploy your PC in a slight turn, then you will be hanging more from one riser. When you are hanging more from one riser, it becomes a pivot point. This is a problem on every harness ever made; the solution is symmetry, and riser control.
Hard openings tend to deliver the most violent body twists. You control the opening force with AIRSPEED. In a wingsuit, you choose your airspeed. You can choose fast or slow, up or down, horizontal or vertical, etc. Find what works best for you and then consciously choose it. Do not just pitch your PC without thinking about what airspeed and angle you want to have for deployment.
Twist Sidenote: If you are jumping anything other than an absolutely tiny beginner wingsuit, it is probably a BAD IDEA to unzip your leg wing. When you do that, the result is that the leg wing will be trailing behind you like a weather vane. This weather vane will make it very difficult for you to rotate under your canopy and untwist. If you then cutaway and your reserve opens in line twists, as they sometimes do, you will once again be dealing with the same weather vane problem. This situation badly injured a good friend of mine a few years ago (he landed very hard under a turning reserve, in line twists). Consider keeping your leg wing zipped up until you’re under a good parachute.
Parachute type: Go lightweight, low bulk, “F-111”, and docile.
It has long been known that 0-3cfm material (F-111) yields better openings than ZP. The porosity of 0-3cfm fabric delivers more consistent and predictable inflation.
ZP fabric is popular in skydiving because it is very durable, and us skydivers have been known to be a little cheap. While it would be nice if our equipment lasted for eternity, the quality of your openings should mean more to you than getting a few extra jumps out of your parachute. Wingsuit specific F-111 canopies have proven to open better and lead to fewer cutaways. When you’re flying a wingsuit, the most critical moment of the skydive is usually the opening.
Regardless of the fabric your parachute is made from, a docile, 7-cell, low aspect ratio design should be considered mandatory. A lightly loaded size “larger-than-you-normally-would”, is best. There has been some discussion on whether sizes smaller than ~120sqft may have line sets which are short enough for the parachute to be sucked back into your burble during deployment. If you think it sucks to have that happen to your PC, wait until your parachute does it. The other day I watched a friend of mine “streamering” head-down under his 109sqft 9-cell ZP design, his lines tangled in a smoke bracket on his left foot. He cleared them by hand and didn’t die, which was awesome. I am pretty sure it was the last wingsuit jump he’ll ever put on that thing, even though it was probably a fun parachute to land.
Pull high, eh? Don’t let a docile parachute make you overconfident.
Once you have a docile, F-111, lightweight wingsuit parachute, you’ll probably get used to it very quickly. The comparatively wonderful openings will give you confidence, and make you happy. And the best way to f*ck up your happiness is to start pulling lower.
All parachutes, regardless of their design, track record, your packing technique or your skill, can and will eventually malfunction. Line twists are practically unavoidable when flying wingsuits, and the probability of other malfunctions may be increased. Give yourself time and altitude to deal with the drama.
To sum it up:
Fly efficiently before and during pull time, maintain awareness through the deployment process and fly your body symmetrically, know how to reach your BOC cleanly and quickly, control your risers, and use the right equipment. Have fun out there.